Crazy cool potholders

I found this pattern on Pinterest. I really loved the idea of alternating colors within a cool pattern to get something like this, but this pattern was crazy hard. Well, it wasn’t really hard, at least technically, but it was hard on my hands. Holding that many stitches together to make a cluster really did a number on my joints. But it was good fun. I made a set for my brother-in-law as a wedding present, which I forgot to take a picture of. And then I made this set, which I think I’ll put on etsy, because I have plenty of pot holders. I was considering making a bunch of sets to sell, but the pattern is so painful that I think this will be the only one, unless people start clamoring for them.

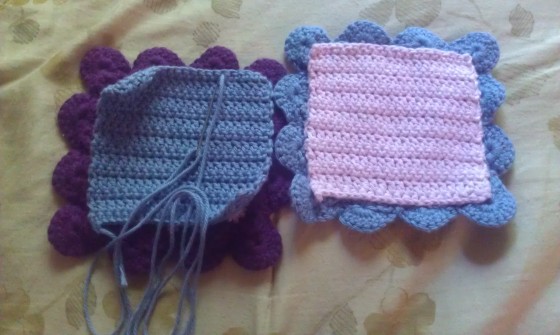
The original pattern is meant to be continued to make an afghan, but I liked the idea of keeping it smaller, plus my hands couldn’t have taken much more. The ones I made for my brother-in-law were without any alterations to the original pattern, but it creates holes, which add fun texture but really only make them useful as trivets. For this set I decided to make a backing to cover the holes so that they can be used to touch hot things.

My pot holders, after doing three different colors, ended up being about 5.75 inches square. I used an F hook and I Love This Cotton yarn. For the backing I did a foundation chain of 20 stitches and then alternated between a row of double crochet and a row of single crochet until it was about square. Then I left a long tail and sewed it onto the back of the potholder. It turned out pretty well and gives the potholder a more hefty feel, which I like to have when taking hot things out of an oven 🙂


Crazy cool potholders


Happy crocheting!

Kristen


I Love Hobby Lobby

Life has been really stressful lately, so sorry for the missing post on Monday and the late one today. I don’t have any projects to share today, but I wanted to talk about my absolute favorite yarn ever. For those of you who have a Hobby Lobby nearby, count yourselves lucky, because they’re brand of cotton yarn I Love This Cotton is fabulous and a joy to crochet with. Plus it’s on sale a lot, and Hobby Lobby has they’re fabulous 40% off coupon you can use on one full-price item every time you go in. I Love This Cotton crochets tightly, is super soft, and doesn’t pill, at least not yet 🙂 And it comes in really pretty colors. I think it’s the best store brand yarn around.

There’s my opinion for you for today. Hopefully life will slow down a little bit, so I can start posting about some projects.

Happy crocheting, everyone!

Kristen

Who doesn’t love Calvin and Hobbes?

I grew up with the Calvin and Hobbes comics. My family had a bunch of the books and I always read it in the paper, and I was heartbroken when Bill Watterson decided to end it. I want my kids to enjoy it as much as I did, and I figured I’d give them an early start. I found the pattern for a crocheted Hobbes, and I plan to give it to my daughter when she’s born.

I haven’t finished it yet. I’m taking it slow, since I still have some time to get it done. But it’s really fun to see it come to life. Those of you who are familiar with amigurumi might be able to figure out how to make this, if you’re interested in figuring it out on your own (if I knew anything about amigurumi, I know I would enjoy the challenge), but, if not, sukigirl has graciously offered her pattern to give the perfect dimensions for an adorable little Hobbes doll.

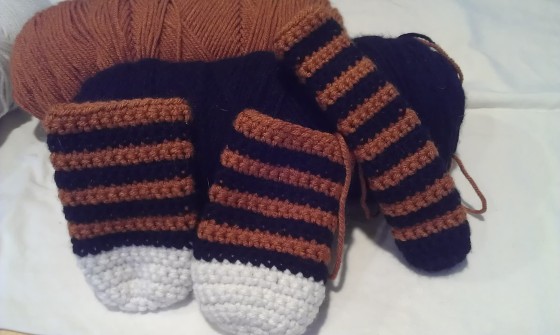
I’ve finished the two legs and the tail so far.

Hobbes piecesI can’t wait to show you the finished product.

In honor of Calvin and Hobbes and Bill Watterson, sukigirl has asked that her pattern only be used to make items that will be given away, no selling allowed. I think she has an excellent point. Watterson never commercialized his comic. The most he allowed was for it to be printed in books, and I think that is exactly how it should stay. You will not see this on our etsy store, but always feel free to make one yourself, or ask your favorite crocheter to make one for you 🙂

Happy crocheting!

Kristen

It was a long weekend

This last weekend I was out of town at my brother-in-law’s wedding. It was a lot of fun and it was great to see family. However I wasn’t able to get a post ready before we left, and I’ve been trying to catch up on sleep and rest. We were running non-stop for the last three days and my poor pregnant body is having a hard time recovering. Crocheting posts will be up again starting on Thursday.

Kristen

Crocheted Coasters

I have some exciting news! We’re having a girl!!! I’m super excited to start making girly things, and we couldn’t be happier to be welcoming a little girl into our family. Okay, that’s my big news. On to the crocheting 🙂


Crochet coasters

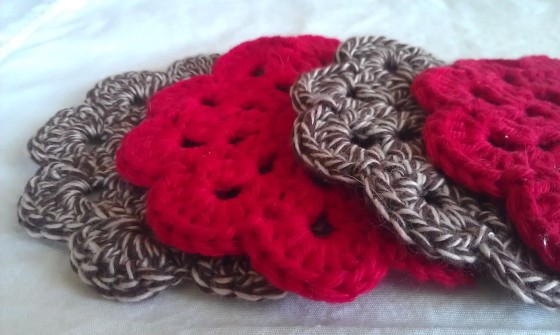
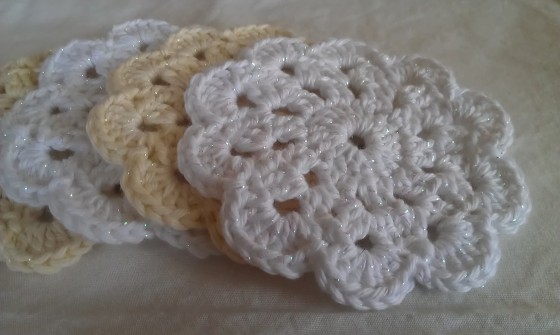
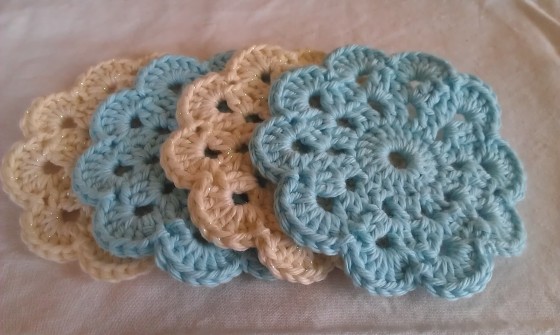
I found this pretty little pattern a while back and decided to make a bunch of sets for family and friends. I adjusted the pattern a little bit to make it look a bit cleaner. Instead of chaining six to start I only chained five. This made the center a little tighter. I also only chained two at the start of each round instead of three. When I chained three to start it created too much space between the height chain and the first double crochet.

If you would like to make some for yourself, you can find the pattern at http://crochet.about.com/od/vintage/ss/aa052606.htm. Or if you’d like to buy one of the sets pictured, you can purchase them from our Etsy shop.

Crochet coasters

Crochet coasters

Happy crocheting!

Kristen

Hook reminders

Hook reminders

Happy Monday Everyone!

My week is off to an interesting start. Our dog got into some ant poison this morning (which was totally my fault and I feel awful about it) and is currently with the vet being treated. We don’t think she ate very much and she should be fine.

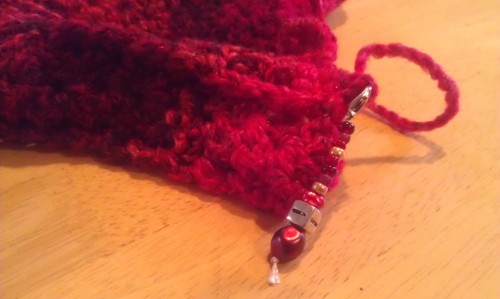
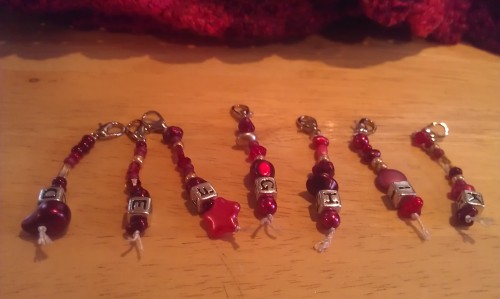
Today’s post isn’t so much about crochet patterns as it is about crochet tools…sorta. I’m always starting new projects before finishing older ones and when I come back to a project that’s been sitting around for a while, I’ve always forgotten which hook I was using. This is mostly because I hardly ever use the recommended hook size, because I generally crochet pretty tight, and I can’t get the right gauge with the hook the pattern says to use. I had an idea similar to this a while back but instead of using the necklace clasps, I was going to just use safety pins with a few decorative beads and a letter bead. Then, I found a fancier version here and just had to make some for myself. Now I can keep all my crochet hooks in their holder when I’m not using them and I never have to worry about misplacing one again. Best thing ever? I think so.

These beautiful little things not only keep your project from unraveling but they remind you what hook you were using for that project.

Hook reminders

The set of letter beads I bought didn’t have a J in it, which is why that one is missing.

We will be selling sets of these beauties in our Etsy shop in the near future. We’re still getting that set up and are hoping we’ll have some wonderful things for sale very soon.

Happy crocheting!

Kristen

Men’s winter hat with bill

IMG_9753

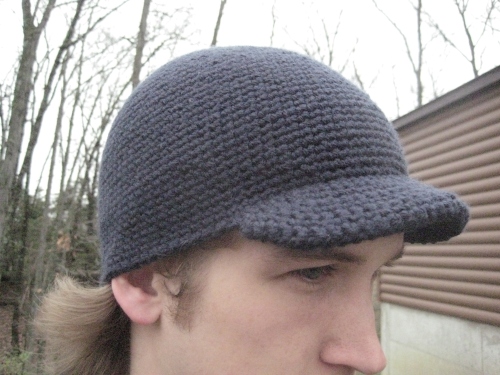
A few years ago my husband lost a winter hat with a bill that he loved to wear. He hasn’t been able to find one to replace it, so he asked that I make him a hat. Unfortunately, I procrastinated this project during the winter and now in the middle of April he won’t have many opportunities to wear it. Today, though, there’s a high of 49 with wind, so he was happy to put it on and wear it to school. I found a pattern that I liked from The Green Dragonfly. Since I altered it quite a bit I’ll repost it here with my changes. I don’t know if my yarn was a smaller size or if my husband just has a huge head, but I had to do several more rounds to increase the circumference of the hat.

I used Vanna’s Choice brand size 4 acrylic yarn in Navy and a G hook. One 3.5 oz skein of this yarn was plenty for this hat.

Hat

Make a magic circle and ch1, 5 sc into the ring (6sc).

Use a stitch marker at the start of each round, do not join

Round 2: Work 2 sc in each stitch around (12)

Round 3: 2 sc in next stitch, sc in next st, repeat around (18)

Round 4: 2 sc in next stitch, sc in next 2 stitches, repeat around (24)

Round 5: 2 sc in next stitch, sc in next 3 stitches, repeat around (30)

Round 6: 2 sc in next stitch, sc in next 4 stitches, repeat around (36)

Round 7: 2 sc in next stitch, sc in next 5 stitches, repeat around (42)

Round 8: 2 sc in next stitch, sc in next 6 stitches, repeat around (48)

Continue in this pattern until you’ve completed 15 rounds with a total of 90 stitches around the edge of the hat. This is the amount I needed for my husband’s head with the yarn and hook size I used.

Rounds 16 – 30: Sc in each stitch around. Fasten off.

Bill

Top Side: Using a couple of stitch markers, mark out 22 stitches on front center of hat.

Row 1: With right side facing, join yarn in first marked st, working in front loops only, sc in each of the 22 stitches.

Row 2: Ch 1, turn, sc in each stitch across, sc in back loops in next 2 stitches on the hat (24)

Row 3: Ch 1, turn, sc in each stitch across, sc in front loops in next 2 stitches on the hat (26)

Row 4: Ch 1, turn, sc in each stitch across, sc in back loop in next 2 stitches on the hat (28)

Row 5: Ch 1, turn, sc in each stitch across, sc in front loop in next 2 stitches on the hat (30)

Row 6: Ch 1, turn, sc in each stitch across, sc in back loop in next 2 stitches on the hat (32)

Row 7: Ch 1, turn, sc in each stitch across, sc in front loop in next stitch on the hat (33)

Row 8: Ch 1, turn, sc in each stitch across, sc in back loop in next stitch on the hat (34)

Fasten off.

Bottom Side

Row 1: With wrong side facing, join yarn on wrong side of Row 1 of brim, sc in back loops of first 22 stitches.

Row 2: Ch 1, turn, sc in each stitch across, sc in front loops in next 2 stitches on the hat (24)

Row 3: Ch 1, turn, sc in each stitch across, sc in back loops in next 2 stitches on the hat (26)

Row 4: Ch 1, turn, sc in each stitch across, sc in front loop in next 2 stitches on the hat (28)

Row 5: Ch 1, turn, sc in each stitch across, sc in back loop in next 2 stitches on the hat (30)

Row 6: Ch 1, turn, sc in each stitch across, sc in front loop in next 2 stitches on the hat (32)

Row 7: Ch 1, turn, sc in each stitch across, sc in back loop in next stitch on the hat (33)

Row 8: Ch 1, turn, sc in each stitch across, sc in front loop in next stitch on the hat (34)

Row 6: Ch 1, turn, sc in each stitch across, sc in back loop in next stitch on the hat (33)

Fasten off.

I cut down the bill from an old ball cap to create stability in the bill. Any heavy plastic cut into the right shape should work well. Using a whip stitch sew in the bill into the two pieces.

Weave in all ends, and Viola!

Have fun!

Kristen
IMG_9754

IMG_9758

We’re the Yarn Hoppers

2102_1074121419467_8935_n

Hello World!

We’re Kristen Davis and Nicole Smith. We were originally Hoppers but we married men with boring last names. We love to crochet and wanted to share our passion with others. We’ll be posting regularly on Mondays and Thursdays, so join us tomorrow with our first official crocheting post.

Thank you for reading!